Monday, September 9, 2013

Warrior Women/The Raven

 
My friends and I got together to shoot yet another installment of "let's dress up and take pictures because why not, we are adults...we do what we want"
 
Alysha is such an amazing photographer. You should go check out her work. I'm lucky enough to have a friend that can take an idea and go crazy with it...I am also lucky enough to have friends that let me paint them up and pose them like real-life dolls!
 
Alysha created a Pinterest Board for inspiration and we all pinned a bunch of stuff and then used it as inspiration.
 
We had a seperate craft day to make all the props and then went for it!
 
I made the animal head covering with an old baseball cap, foam, wire, hot glue, and fake fur!


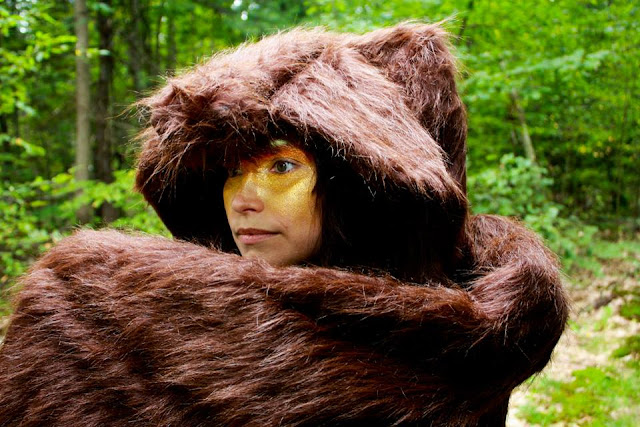
For Kelly and Kim's makeup we wanted to keep it simple. As if they found these colors in the woods:

 
Kelly also wanted some arm bands. I used turquoise to tie in the colors in her necklace. Kelly's hair started off HUGE but the humidity got the best of it and it just fell flat. It was SOOOO hot!


Both outfits were made with clothes we had, items from the salvation army, and stuff we made at craft night!


For my costume I wanted wings, but not literally. Then of course I just went insane with the makeup.


Wednesday, August 21, 2013

Face Painting


First.....I love face painting!


This past weekend my cousin and I set up shop at the Templeton Arts and Crafts Festival. It was VERY busy and we met so many awesome people!
  
(I got permission from every parent to take pictures of their kids AND to use them anywhere I wanted...so if any parents see this, THANK YOU!)
 
We were asked to participate in the Greenfield Fair in September and asked to come back to the Templeton fair next year!


Here are the pictures!


This little one won the raffle for a free face painting session, so she got a custom one just for her! 


My niece and nephew came at the end to visit the booth (and my nephew painted my face!)


Thursday, July 25, 2013


Friends and Photos
 
Can I just tell you how I have the best friends in the world? I feel inspired by these lovelies all the time! Alysha McCooe has the most fantastic eye. She is very precise and strives for perfection during shooting and even afterwards while editing her shots. I have literally seen her remove dust particles from the lapel of a groom's picture.That girl is dedicated I tell ya!
 Our latest project was a photoshoot inspired by fantasy.
 
My niece was the centerpiece in this project. I have been wanting to use her for a photo shoot for a while. She is very tall, has enchanting doe eyes, the most adorable button nose, and a delicate frame.
 
She mentioned how she always thought it would be cool to be a mermaid.
 
DONE AND DONE!
 
You don't have to tell me and Alysha twice!
 
I started off researching how to make mermaid tails. As usual, Pinterest is so helpful in finding ideas. Of course it's a wonderful way to gather inspiration and I'm always careful not to blatantly rip off other people's work (It's definitely happened to ME before!)
 
 
Making the tail
I measured Savannah every 2 inches starting at her bellybutton....wait let's back up....I originally had her lay on a large piece of paper and I outlined her, cut out 2 pieces of that fabric, but when she tried it on it was SKIN TIGHT.
 
WHY?
 
Because I forgot she is 3D
 
THEN I measured Savannah every 2 inches starting at her bellybutton, transfered that onto NEW fabric I bought sparkly glitter dot fabric
 (which RUINS your thread...causing you to re-thread your machine every inch or so. Good times.)
 
To make the fin I used kind of the same idea you would to make fairy wings. I used heavy gague wire and shaped it into the fin form, then stretched the fabric over it. To stabilize I used cardboard and duct tape (duct tape...you my only fren).


Making the top
THIS was the easy part! I bought some stretchy fabric and hand sewed it onto an old bra. I also used some gauze-y fabric gathered around the top to give it a little more interest.


Making the headpiece
I took the same gague wire I used for the tail and shaped it against savannah's head, I then used a glue gun to attach some extra tail fabric onto it. I took a vintage necklace I found at a thrift store and hot glued that on along with some pearls.
 
Makeup time!
I didn't want her makeup to be ridiculous. My vision was very delicate (just like her) with sparkles!
 
I purchased the wig from Costume Shopper for $32 (including shipping). It came VERY fast and it was pretty nice quality for the price! I braided a fishtail braid in the front and off-set the part to make it look more natural.

 
I can't wait for our next project! EEEP!


About Me

My photo
I'm a happy soul who loves creating things. I married my best friend who I fall in love with more and more every day.