Wednesday, November 5, 2014

Becoming Maleficent

 
The SECOND they announced Angelina Jolie was going to play Maleficent, I knew what my Halloween costume would be! I've seen the movie 3 times and it JUST came out yesterday on DVD...I can't believe I haven't already bought it.
 
 
I made my horns with a combination of plastic bags, duct tape, electrical tape, newspaper, wire, and paper clay.
 
 
I bought a bunch of black fabric from a local fabric shop and sewed a simple cloak. The collar is just newspaper and duct tape hot glued to an old t-shirt that I wore under the cloak!
 
My staff was found in my yard! I peeled the bark off of a gnarly branch, then wrapped grape vines around it. I just realized I never got great pictures of it.


I knew the makeup wasn't going to be as time consuming as some of the other makeup I've donned in the past....
 
My husband and I as "The Newlydeads"
 
(I make all face appliances we are wearing)


Cheshire Cat and White Rabbit
 
(I REFUSE to wear contacts ever again. Those were horrible. See how the right one is turned?! I looked like a derpy frog half the night. Plus they were super itchy and irritating)
 
Ventriloquist Dummy
 
 
I really didn't want to attempt to do the appliances on her cheeks. I didn't want there to be a stupid line I had to blend out. PLUS I didn't have much time after work to apply makeup so I started looking for makeup tutorials. It's always nice to see what other people do and Kandee Johnson is simply MAGICAL and has such great tips. So I used her Maleficent Makeup Tutorial
 
 
I was VERY happy with the results! What do you think?


Monday, November 18, 2013

Makeup

 
I haven't always been a makeup person.
 
When I was in high school I BARELY wore it, as I got older I thought it was a waste of time. However, I have always loved special effects makeup. I remember watching the behind the scenes video of thriller over and over. I was amazed at the entire process.
 
 
While in cosmetology school in 2008 I worked at a local "horror theme park" doing special effects makeup and LOVED it. I did it for the next season as well, but as luck would have it I got back into a crappy relationship with someone who would rather I stayed home than pursue anything he didn't think was interesting.  
 
The moment finally came when I broke free from that poisonous relationship and started seeing someone new. I also (around the same time) joined a belly dance troupe and was able to go as wild as I wanted with my makeup. I also got to "play" with other people's hair and makeup too!  


My husband and I have dressed up a few times as "The Newlydeads" and made appearances at Salem, MA on halloween.


(I made the appliances myself...tutorial soon maybe!?)
 
 
I love being behind the camera as well and have done hair, makeup, lighting, and editing on these next few shots for a photo project.


(technically I think my husband may have snapped this one of me. It was hard to hold the apple like that, then run back to position.)
 
 
 I also have some fantastic friends who I have collaborated with on photo shoots!
All of the following pictures are from Alysha McCooe Photography and makeup by me


As you can probably tell....I LOVE halloween!
 
I was the cheshire cat last year
 

and a ventriloquist dummy this year


Over the past few years I started doing children's face painting at parties and craft fairs.


I don't know where that really puts me. I basically love the art of painting people's faces and maybe one day I can work on a movie with Tim Burton. Wait...where did that come from? hahaha slid that right in there.


Thursday, October 10, 2013

Ruffled Curtains

 
My good friend and partner in photography crime Alysha is pregnant with her second child, but her first GIRL! As she was shopping to set up her fantastic baby room, she found the perfect Ruffled Curtains.
 
Fabulous right?!
Definitely.
 
Deliciously girly? 
Oh yes.
 
Expensive?
OF COURSE!
 
I told her I could easily make them at half the price! I could also make them in the color she wanted.
 
Famous last words.
 
 However, this project ended up being as easy as I thought. That is VERY RARE indeed! * 
(*as easy as it was, it does take TIME. I'm not promising a quick project. Just an easy one!)
 
Make this project using these 10 easy steps!
 
Step #1 Measure
Her window is 46X60 (well....not really, we measured a bit lower)
 
Step #2 Purchase
We bought one cut of white lightblock fabric. 46X54 (it was sold shorter than we wanted but we both agreed that the bottom ruffle will extend so it really SHOULDN'T matter) and 5 yards of light purple fabric.
 
Step #3 Cut
I cut 14 pieces 6"X70". I know that sounds like the piece will be too wide for the window, but I needed to factor in the loss when I ruffled each piece.
 
I also cut a top piece 5"X43"to hide the top ruffle.
 
Step #4 Hem
Hem the bottom and sides of each piece 1/4" (this includes the 15th piece that will cover the top). You don't need to hem the tops of any of them because they will all be ruffled and then hidden under the one on top of it.
  
Step #5 Press
I know, I know, you should press your fabric before you cut it. Whatever. It's fine. I ironed all the pieces I hemmed at this point and the world didn't end.
 
Step #6 Ruffle
Using the longest stitch on your machine (or you can hand sew a long stitch), stitch along the un-hemmed edge of each piece. Then, pull the back thread of each piece to ruffle.
 
Step #7 Make the Pocket
 Fold the top of your light block fabric over and sew across to make a pocket for the curtain rod.  
 
Step #9 Attach
If all looks great, start sewing all of your pieces (starting from the bottom) to the light block fabric.
 
Step #10 Finish
Grab your "cover" piece you cut in Step#4 and put it right over the top. The hemmed part will show in the front, but will cover the last stitch. Since it will go up and over the top, you'll be sewing it to the back as well...so pin and sew carefully!

Here is the finished product!


If you want to make this and have any questions, please email me!

Also, remember to like my Facebook Page!!


Monday, October 7, 2013

Face Painting benefit

 
In September I received a message from a friend about her good friend unexpectedly passing away, leaving 2 children behind. She asked if I would donate some face painting time to the benefit she was throwing.
 
OF COURSE!
 
I donated all of the proceeds from the faces I did to Brianna and Cole Phylis.
 
These weren't all the faces I painted...only the unique ones!
 
My husband snapped this one of me "hard at work"


Peacock feathers
 
 
Unicorn!
 
 
creeping vines (I added the eyeshadow for extra woodland fairy awesomeness)


Kitty Cat
 
 
This is a new one! He wanted "BANE" from Batman
 
 
Another one I haven't ever done "TWO FACE" from batman
(now that I look, I think the mouth shape should have been more exaggerated, but hey...not bad right?)   


Remember to "like" my face painting page on Facebook for updates!


Monday, September 9, 2013

Warrior Women/The Raven

 
My friends and I got together to shoot yet another installment of "let's dress up and take pictures because why not, we are adults...we do what we want"
 
Alysha is such an amazing photographer. You should go check out her work. I'm lucky enough to have a friend that can take an idea and go crazy with it...I am also lucky enough to have friends that let me paint them up and pose them like real-life dolls!
 
Alysha created a Pinterest Board for inspiration and we all pinned a bunch of stuff and then used it as inspiration.
 
We had a seperate craft day to make all the props and then went for it!
 
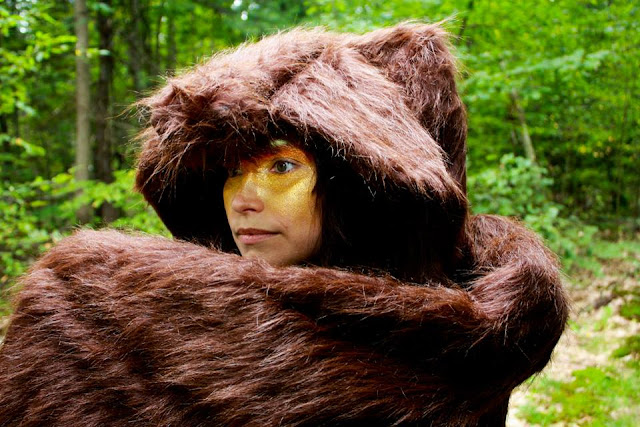
I made the animal head covering with an old baseball cap, foam, wire, hot glue, and fake fur!


For Kelly and Kim's makeup we wanted to keep it simple. As if they found these colors in the woods:

 
Kelly also wanted some arm bands. I used turquoise to tie in the colors in her necklace. Kelly's hair started off HUGE but the humidity got the best of it and it just fell flat. It was SOOOO hot!


Both outfits were made with clothes we had, items from the salvation army, and stuff we made at craft night!


For my costume I wanted wings, but not literally. Then of course I just went insane with the makeup.


About Me

My photo
I'm a happy soul who loves creating things. I married my best friend who I fall in love with more and more every day.